
Understanding how to control your home heating does not need to be complicated. This salus thermostat manual for beginners is written to simplify installation, configuration, and daily usage so that even first-time users can feel confident. Salus thermostats are designed with usability in mind, making them a popular choice for homeowners who want better temperature control without advanced technical knowledge.
In the first few minutes of setup, many users feel unsure about wiring, pairing, or programming schedules. This guide addresses those concerns clearly and practically, following the same logic you would find in an official salus thermostat manual, but explained in plain language.
What Is a Salus Thermostat?
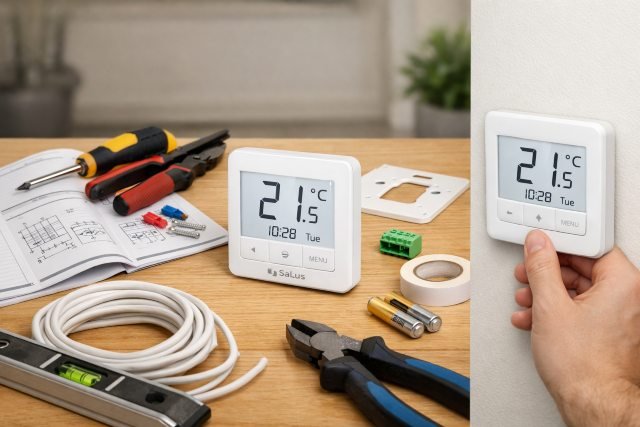
A Salus thermostat is a temperature control device that communicates with your boiler or heating system to maintain a comfortable indoor climate. It measures room temperature and turns heating on or off depending on your selected settings. Salus thermostats are widely used across Europe and the UK because they are reliable, affordable, and easy to operate.
Most Salus models fall into wired, wireless, programmable, or smart categories. While features differ slightly, the core principles explained in any salus thermostat manual remain consistent across models, which makes learning one system useful for understanding others.
Why Salus Thermostats Are Ideal for Beginners
Salus thermostats are especially beginner-friendly because they focus on clarity rather than complexity. The screens are easy to read, buttons are clearly labeled, and menu options follow a logical order. This reduces the learning curve that often discourages new users from programming their heating properly.
According to the UK Energy Saving Trust, correct thermostat usage can reduce heating costs by up to ten percent per year. This means that learning how to use your Salus thermostat correctly is not only about comfort, but also about long-term savings.
Preparing for Installation
Before starting installation, it is important to turn off power to your boiler to ensure safety. Most beginners overlook this step, but it is always emphasized in every official salus thermostat manual. Once power is off, choose a mounting location that represents the average room temperature. Avoid placing the thermostat near radiators, windows, or direct sunlight, as this can cause inaccurate readings.
Having batteries ready is also essential, as many Salus thermostats rely on battery power even when wired to the boiler.
Installing a Salus Thermostat
Installation depends on whether your Salus thermostat is wired or wireless, but both follow a simple process. For wired models, the thermostat connects directly to the boiler using standard terminals. The wiring diagram inside the unit shows where each wire should go, and following this diagram carefully prevents most installation issues.
Wireless models are even simpler because the thermostat communicates with a receiver connected to the boiler. Once powered, the thermostat and receiver are paired using a synchronization process. This pairing step is clearly explained in every salus thermostat manual, and usually takes less than two minutes to complete.
If at any point the wiring or pairing process feels unclear, consulting a qualified electrician is always recommended.
First-Time Setup and Configuration
Once the thermostat is powered on, it will prompt you to complete initial setup. This includes setting the correct date and time, choosing temperature units, and selecting how you want to control your heating. These steps ensure that schedules and temperature changes work accurately.
The setup menu is designed to be intuitive, and most beginners complete it without needing additional support. Following the on-screen prompts carefully is the best approach, as they mirror the instructions found in the salus thermostat manual.
How to Use a Salus Thermostat Daily
Daily use of a Salus thermostat is straightforward. In manual mode, you simply increase or decrease the temperature using the arrow buttons. The thermostat will maintain that temperature until you change it again.
Programmable mode allows your heating to follow a schedule throughout the day. This is ideal for people who leave the house at regular times or want lower temperatures at night. Once programmed, the thermostat automatically adjusts heating without requiring daily input.
Many beginners start with manual mode and transition to programmable mode once they feel more comfortable.
Programming Heating Schedules
Programming is where Salus thermostats truly shine. You can set different temperatures for different times of day, ensuring warmth when needed and savings when it is not. Most Salus models allow separate weekday and weekend schedules, giving you flexibility without complexity.
When following a salus thermostat manual, the key is to keep schedules simple at first. Setting too many temperature changes can be confusing. Starting with morning, daytime, evening, and night settings provides a good balance between comfort and efficiency.
Understanding Display Icons and Controls
The display icons on a Salus thermostat communicate important information at a glance. A flame icon usually indicates active heating, while a battery symbol warns when power is low. A clock symbol confirms that a programmed schedule is running.
Understanding these icons reduces confusion and prevents unnecessary troubleshooting. Over time, users become familiar with them and rely less on the printed salus thermostat manual.
Saving Energy with a Salus Thermostat
Using a thermostat efficiently is one of the easiest ways to reduce household energy consumption. Lowering your heating temperature by just one degree Celsius can lead to noticeable savings over a year. Programming heating to turn off when the house is empty also prevents wasted energy.
The International Energy Agency confirms that smart temperature control is among the most effective energy-saving measures available to households.
Common Problems and Solutions
Occasionally, beginners encounter issues such as the thermostat not turning on or heating not responding. In most cases, these problems are caused by low batteries, incorrect pairing, or boiler power being turned off.
Temperature inaccuracies are often the result of poor placement rather than device failure. Relocating the thermostat usually resolves this issue. These scenarios are all covered in the troubleshooting section of a typical salus thermostat manual, making them easy to fix without professional help.
Frequently Asked Questions
Many beginners ask how to reset a Salus thermostat. In most models, this is done through the settings menu or by holding the reset button for several seconds.
Battery replacement is another common question. Replacing batteries once per year is generally sufficient unless the low-battery icon appears earlier.
Compatibility with boilers is also a frequent concern. Salus thermostats work with most combi and conventional boilers, which is why they are widely recommended by installers.
Conclusion: Mastering Your Salus Thermostat with Confidence
This beginner-focused salus thermostat manual shows that controlling your home heating does not require technical expertise. With clear installation steps, intuitive controls, and flexible programming options, Salus thermostats are well-suited for anyone new to heating controls.
By taking time to understand setup and daily operation, you can improve comfort, reduce energy bills, and rely less on trial and error. Once familiar with the basics, your Salus thermostat becomes a powerful yet simple tool for managing your home environment efficiently.